Shower Ceiling Renovation
Welcome to Aberdeen Showers
Shower Ceiling Renovation
About Shower Ceiling Renovation
Renovating a shower ceiling can significantly enhance the overall appearance and functionality of a bathroom. Homeowners considering this project should be aware of various factors that can influence the outcome. The choice of materials, the condition of the existing structure, and design preferences all play a critical role in the renovation process.
One of the primary considerations is the material selection for the new ceiling. Common options include moisture-resistant drywall, tiles, and PVC panels. Each material offers distinct advantages. For instance, moisture-resistant drywall is often preferred for its cost-effectiveness and ease of installation. Tile ceilings, on the other hand, provide a more luxurious finish and are highly durable against moisture.
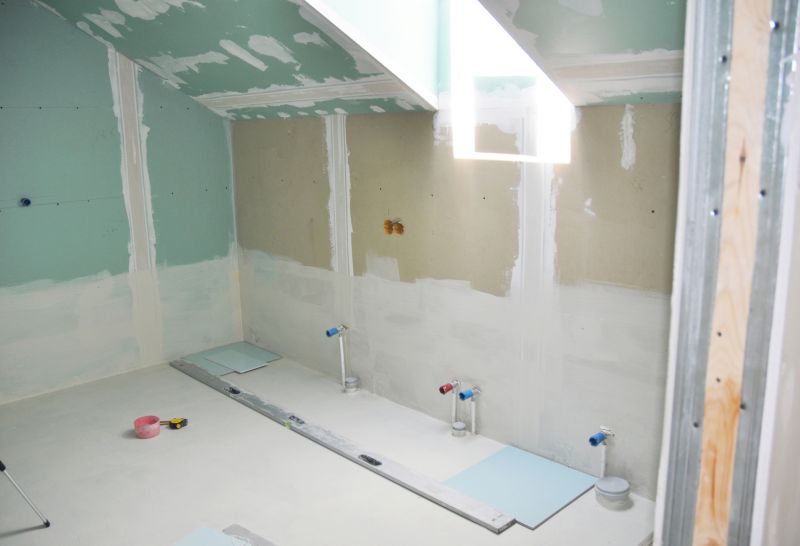
The condition of the current ceiling is another crucial factor. Homeowners should assess whether there are any signs of water damage, mold, or mildew, which may require addressing before any renovation work begins. Ensuring that the underlying structure is sound will help prevent future issues and extend the life of the new ceiling.
Ventilation is essential in a shower area to prevent moisture buildup, which can lead to mold growth. During the renovation, it might be an opportune time to evaluate the existing ventilation system. Improvements or upgrades to the ventilation can enhance air circulation and maintain a healthier bathroom environment.
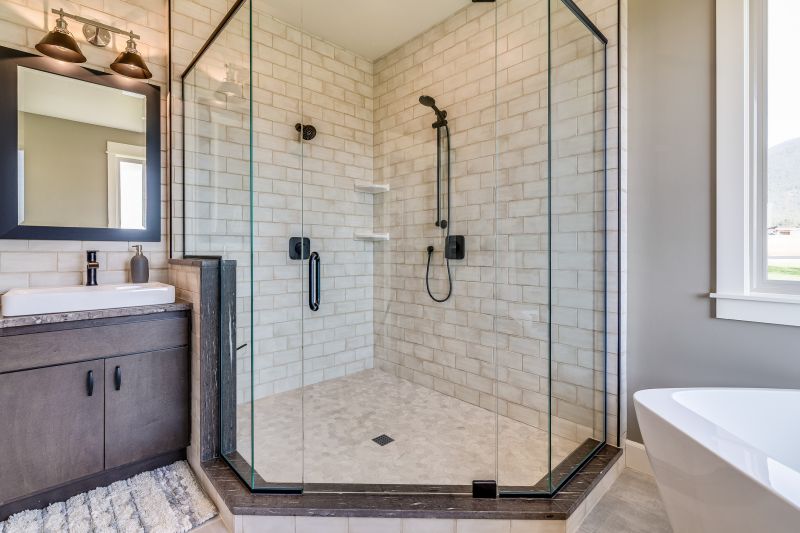
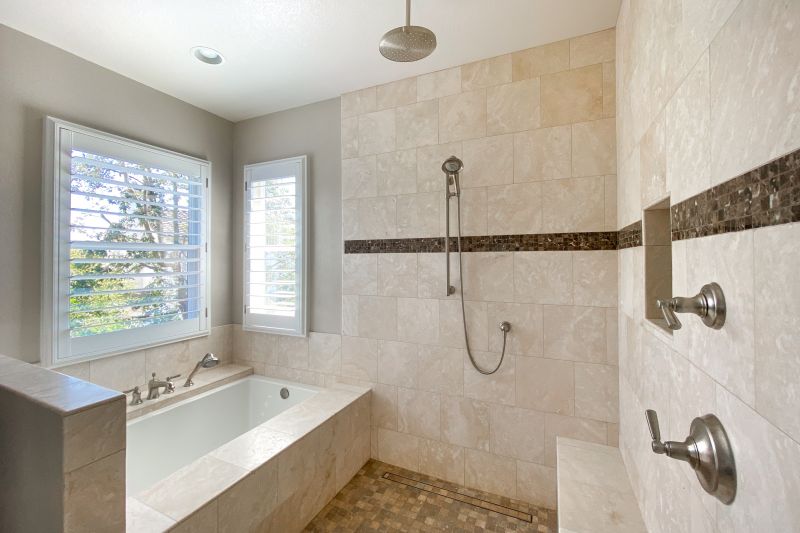
Design preferences are also important when planning a shower ceiling renovation. Homeowners may choose to incorporate various aesthetic elements such as recessed lighting, decorative moldings, or even a skylight. These features can add both functionality and visual appeal, transforming the bathroom into a more inviting space.
Lighting plays a significant role in bathroom aesthetics and functionality. During a ceiling renovation, it is an ideal opportunity to consider new lighting options. Recessed lighting is a popular choice for its sleek appearance and ability to evenly illuminate the space. Additionally, waterproof fixtures should be considered to ensure safety and longevity in the humid environment.
Homeowners should also be mindful of the maintenance requirements of different ceiling materials. For instance, while tiles are low-maintenance and easy to clean, they may require periodic re-grouting. PVC panels are virtually maintenance-free but may not offer the same aesthetic appeal as tiles.
It is beneficial to plan the renovation project with a clear understanding of the desired outcome and any potential challenges. This includes setting a realistic timeline, understanding the scope of work involved, and considering any additional features that may enhance the shower experience.
- Material selection: Moisture-resistant drywall, tiles, PVC panels
- Assessing existing conditions: Water damage, mold, mildew
- Ventilation: Evaluate and upgrade if necessary
- Design features: Recessed lighting, moldings, skylights
- Lighting: Recessed and waterproof fixtures
- Maintenance: Cleaning and upkeep requirements
Ultimately, a shower ceiling renovation can greatly improve the functionality and aesthetic of a bathroom. By carefully considering material choices, structural conditions, and design elements, homeowners can create a space that is both beautiful and practical. Planning and attention to detail are key to achieving a successful renovation that meets all expectations.
Choosing the Right Materials for Shower Ceiling Renovation
Explore the best materials for durability and style in your shower ceiling renovation.
Renovating a shower ceiling can significantly enhance the overall appearance and functionality of a bathroom. Selecting the appropriate materials is crucial, as the shower area is constantly exposed to moisture and temperature fluctuations. Homeowners should consider materials that offer both durability and aesthetic appeal, ensuring a long-lasting and visually pleasing result.
One popular choice for shower ceilings is moisture-resistant drywall, also known as green board. This type of drywall is specifically designed to withstand humid conditions, making it an ideal option for bathrooms. Its water-resistant properties help prevent mold and mildew growth, which can be a common issue in damp environments. Additionally, it provides a smooth surface that can be painted or finished with various textures to match the desired bathroom decor.
For those seeking a more luxurious look, tile is a fantastic option for shower ceilings. Tiles offer a wide range of styles, colors, and patterns, allowing for a customized design that complements the rest of the bathroom. Ceramic and porcelain tiles are particularly suitable for wet areas due to their water-resistant nature. While tile installation might require more effort, the result is a stunning, easy-to-clean surface that can withstand the test of time.
Another material worth considering is PVC (polyvinyl chloride) panels. These panels are lightweight, easy to install, and highly resistant to moisture and mold. PVC panels come in various designs, including options that mimic the appearance of wood or stone, providing a stylish yet practical solution for shower ceilings. Their low-maintenance nature makes them an appealing choice for busy homeowners.
Wood can also be used for shower ceilings, but it requires careful selection and treatment to ensure longevity. Cedar and teak are popular wood choices due to their natural resistance to moisture and decay. When properly sealed and maintained, a wooden shower ceiling can add warmth and elegance to a bathroom. However, it is essential to ensure proper ventilation to prevent any potential moisture-related issues.
- Moisture-resistant drywall
- Ceramic or porcelain tiles
- PVC panels
- Cedar or teak wood
Ultimately, the choice of material for a shower ceiling renovation depends on personal preferences, budget, and the overall design vision for the bathroom. By carefully considering the options available, homeowners can create a beautiful and functional shower space that enhances their daily routine and adds value to their home.

Step-by-Step Guide to Renovating Your Shower Ceiling
A comprehensive walkthrough of the shower ceiling renovation process from start to finish.
Renovating a shower ceiling can transform the overall look of your bathroom, enhancing both its functionality and aesthetic appeal. Before diving into the project, it's essential to assess the current condition of the ceiling. Look for signs of water damage, mold, or peeling paint, which are common issues in moisture-prone areas like bathrooms. Addressing these problems early on will ensure a more durable and attractive finish. Once the assessment is complete, gather the necessary materials for the renovation. These might include moisture-resistant drywall, waterproof paint, and appropriate tools for installation and finishing. It's crucial to choose materials specifically designed for high-humidity environments to prevent future damage and maintain a fresh appearance over time. Begin the renovation by carefully removing any damaged or outdated material from the existing ceiling. This step may involve scraping off old paint or replacing sections of drywall. Ensure that the surface is clean and smooth before proceeding to the next phase. Proper preparation is key to achieving a professional-looking result. After the surface is prepped, install the new materials. If using drywall, ensure it is securely fastened and seams are properly sealed. This will help prevent moisture from seeping through and causing damage. Once the new ceiling is in place, apply a coat of primer followed by waterproof paint. Choose a color that complements your bathroom's overall design for a cohesive look. As you work through the renovation process, pay attention to ventilation. Proper airflow is crucial in a bathroom to reduce humidity levels and prevent mold growth. Consider installing or updating an exhaust fan to enhance ventilation, which will also help in maintaining the integrity of your newly renovated ceiling.- Assess the current condition of the ceiling.
- Gather moisture-resistant materials and tools.
- Remove any damaged or outdated material.
- Install new drywall or ceiling material.
- Apply primer and waterproof paint.
- Ensure proper ventilation is in place.