Shower Valve Replacement
Welcome to Aberdeen Showers
Shower Valve Replacement
About Shower Valve Replacement
Shower valve replacement is an essential task for homeowners looking to maintain or improve their bathroom's functionality. A shower valve controls the flow and temperature of water, making it a crucial component for a comfortable shower experience. Over time, these valves can wear out due to frequent use, hard water, or aging plumbing systems, necessitating a replacement.
When considering a shower valve replacement, it's important to understand the different types of valves available. The most common types include pressure-balancing valves, thermostatic valves, and diverter valves. Pressure-balancing valves help maintain a consistent water temperature by adjusting the flow of hot and cold water, which is particularly useful in households with fluctuating water pressure. Thermostatic valves allow for precise temperature control and are often favored for their ability to prevent sudden changes in water temperature. Diverter valves, on the other hand, are used to switch the flow of water between different outlets, such as a showerhead and a bathtub faucet.
Homeowners should also consider the compatibility of the new valve with their existing plumbing system. It's crucial to ensure that the valve fits properly within the existing setup to avoid leaks or other plumbing issues. Additionally, the choice between a single-handle or dual-handle valve can affect both the aesthetic and functionality of the shower. Single-handle valves offer a sleek, modern look and are easier to operate, while dual-handle valves provide separate controls for hot and cold water, allowing for more precise temperature adjustments.
Material choice is another important factor in shower valve replacement. Valves are typically made from brass, stainless steel, or plastic. Brass and stainless steel are known for their durability and resistance to corrosion, making them popular choices for long-lasting installations. Plastic valves, while more affordable, may not offer the same level of durability but can be suitable for budget-conscious homeowners.
It's also worth considering the brand and model of the shower valve, as some manufacturers offer features such as anti-scald protection or water-saving capabilities. Researching different models can provide insight into the features that best suit a household's needs.
When planning for a shower valve replacement, homeowners should be aware of any local building codes or regulations that may impact the installation. Compliance with these codes ensures that the plumbing system remains safe and efficient.
The process of selecting a shower valve can be simplified by considering the following factors:
- Type of valve (pressure-balancing, thermostatic, diverter)
- Compatibility with existing plumbing
- Material (brass, stainless steel, plastic)
- Design preference (single-handle vs. dual-handle)
- Additional features (anti-scald, water-saving)
By taking these considerations into account, homeowners can make informed decisions that enhance the functionality and comfort of their shower experience. Proper selection and installation of a shower valve can lead to improved water efficiency, enhanced safety, and a more enjoyable daily routine.
Choosing the Right Shower Valve for Your Bathroom
Factors to Consider When Selecting a Shower Valve
When it comes to enhancing your bathroom's functionality and aesthetics, selecting the right shower valve is crucial. A shower valve not only controls the flow and temperature of the water but also plays a significant role in the overall shower experience. With various types available, understanding the different options can help you make an informed decision that suits your needs and bathroom design.
One of the primary considerations when selecting a shower valve is compatibility with your existing plumbing system. It's essential to ensure that the valve you choose can be integrated seamlessly with your current setup. This often involves checking the valve's size and connection type to match your plumbing. Consulting a professional plumber for advice on compatibility can prevent potential installation issues.
Another important factor is the type of valve that best fits your requirements. There are several types of shower valves, including thermostatic, pressure-balancing, and diverter valves. Thermostatic valves are designed to maintain a consistent water temperature, providing safety and comfort. Pressure-balancing valves, on the other hand, adjust the water pressure to prevent sudden temperature changes, which can be particularly beneficial in households with varying water usage.
Consider the design and finish of the shower valve as well. The valve should complement your bathroom's overall style, whether it's modern, traditional, or somewhere in between. Many valves come in various finishes, such as chrome, brushed nickel, and oil-rubbed bronze, allowing you to match them with other fixtures in your bathroom for a cohesive look.
Durability and material quality are also crucial when choosing a shower valve. Opting for a valve made from high-quality materials can ensure longevity and reduce the need for frequent replacements. Brass and stainless steel are popular choices due to their resistance to corrosion and wear. Investing in a durable valve can save you from future maintenance hassles.
- Check compatibility with existing plumbing
- Choose the right type of valve for your needs
- Consider design and finish for aesthetic appeal
- Ensure durability with quality materials
Finally, it's worth considering any additional features that might enhance your shower experience. Some modern shower valves come with built-in features such as anti-scald protection, which prevents the water from reaching dangerously high temperatures. Others may include options for multiple shower outlets, offering more flexibility in your shower setup.
In conclusion, selecting the right shower valve involves careful consideration of several factors, including compatibility, type, design, durability, and additional features. By taking these into account, you can choose a valve that not only meets your functional needs but also enhances the overall look and feel of your bathroom. With the right choice, you can enjoy a comfortable and efficient shower experience for years to come.
Step-by-Step Guide to Replacing a Shower Valve
DIY Instructions for Shower Valve Replacement
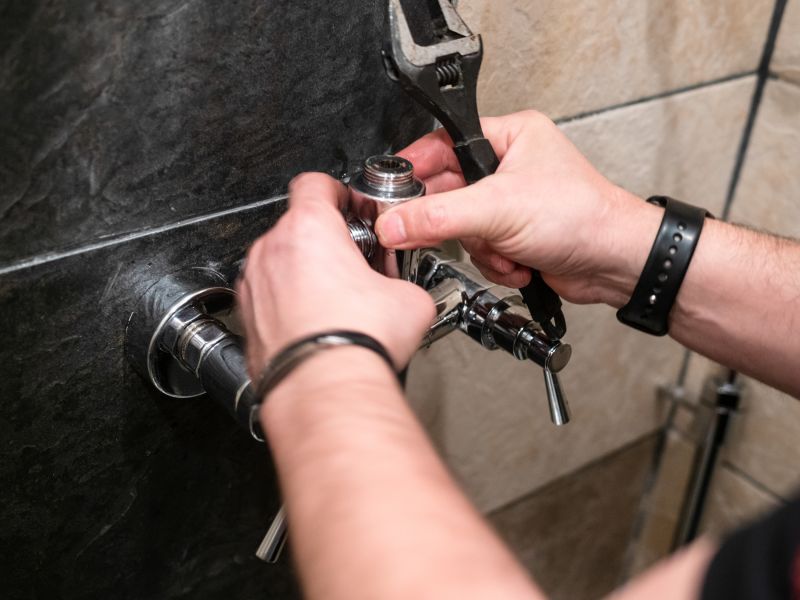
Replacing a shower valve can be a rewarding project for homeowners looking to enhance their bathroom's functionality and aesthetics. This task involves several steps, but with careful planning and the right preparation, it can be accomplished efficiently. Before starting, ensure that you have all necessary materials and tools at hand, such as a new shower valve, a screwdriver, a pipe wrench, plumber's tape, and a bucket.
The first step in replacing a shower valve is to turn off the water supply to prevent any leaks or spills. Locate the main water valve in your home and shut it off. Once the water is turned off, open the shower faucet to drain any remaining water in the pipes. This will make the valve replacement process smoother and less messy.
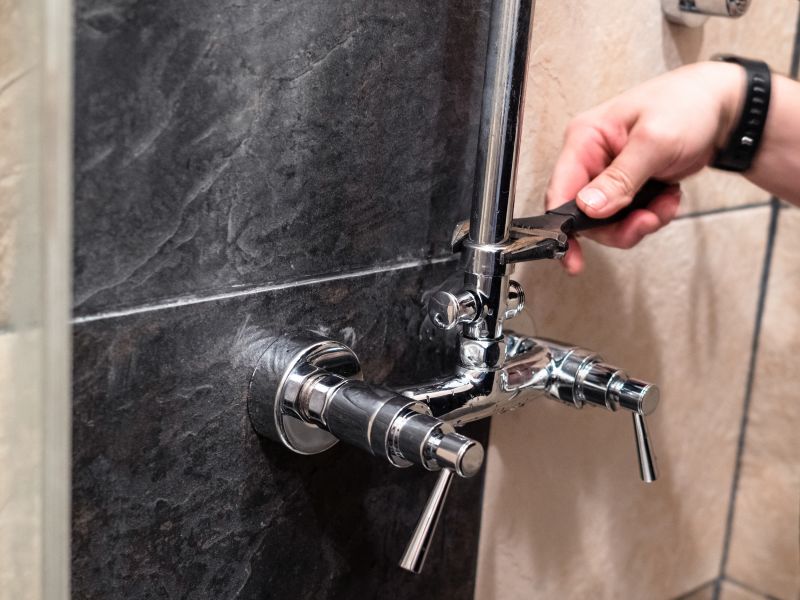
Next, remove the shower handle and trim plate to expose the valve. Use a screwdriver to detach these components carefully. Keep all screws and parts in a safe place to ensure easy reinstallation later. Once the handle and trim plate are removed, you will have clear access to the valve.
With the valve exposed, use a pipe wrench to disconnect the old valve from the plumbing. Be gentle to avoid damaging the pipes. After removing the old valve, clean the area thoroughly to ensure a proper fit for the new valve. Apply plumber's tape to the threads of the new valve to create a watertight seal.
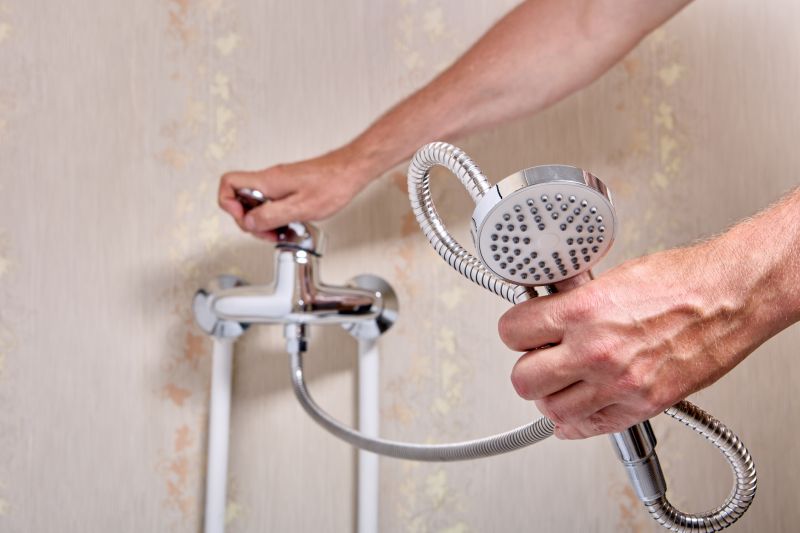
Install the new valve by securing it in place with the pipe wrench. Make sure it is tightly connected to prevent any leaks. Once the valve is installed, reattach the trim plate and shower handle. Ensure that all components are aligned correctly and that the handle operates smoothly.
- Turn off the water supply before starting.
- Remove the shower handle and trim plate.
- Disconnect the old valve carefully.
- Install the new valve with plumber's tape.
- Reattach the trim plate and handle.
- Test the new valve for leaks and functionality.
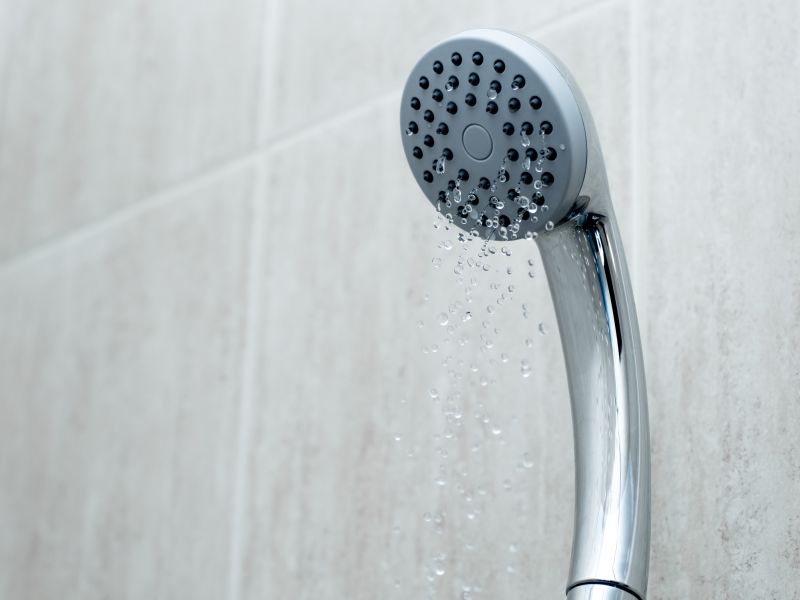
After reassembling the shower components, turn the water supply back on and test the new valve. Check for any leaks and ensure that the water temperature and flow are as desired. If everything is in order, you have successfully replaced your shower valve. Regular maintenance and occasional checks can prolong the life of your new valve and keep your shower in optimal condition.